
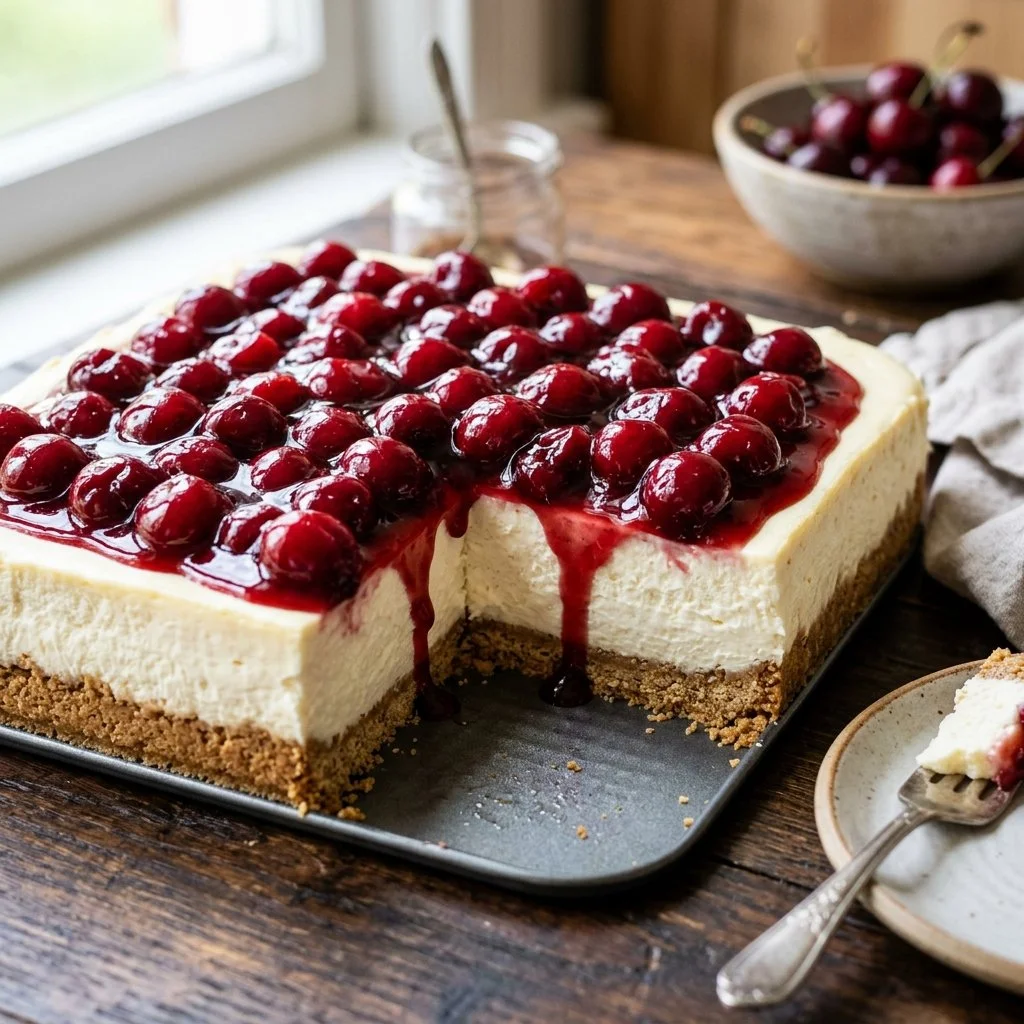
There’s something timeless about dessert traditions, a sense of nostalgia that wraps around you like a warm blanket on a chilly evening. I remember the first time I had a slice of cherry cheesecake—it was at a family gathering, the kind where laughter mingled with the aroma of delicious food. My aunt had worked her magic in the kitchen, and as I took that first bite, the creamy texture and sweet burst of cherry brought forth an avalanche of memories. Fast forward to today, and I find myself craving that simple pleasure yet balancing a busy life that leaves no room for extensive baking. Enter the No Bake Cherry Cheesecake—it’s like inviting that gentle nostalgia back, without the fuss of turning the oven on.
Recipe Timing
- Prep Duration: 20 minutes
- Active Cooking: 20 minutes
- Total Duration: 4 hours 20 minutes (including chilling time)
- Portion Size: Serves 8
- Complexity: Simple
Nutritional Recipe
- Calories per portion: Approximately 310
- Protein: 4 grams
- Carbs: 37 grams
- Fats: 19 grams
- Fiber: 1 gram
- Sugars: 14 grams
- Sodium: 145 mg
Why You’ll Love This No Bake Cherry Cheesecake
This No Bake Cherry Cheesecake is a blissful combination of creamy, velvety cream cheese and sweet whipped cream, all resting atop a buttery graham cracker crust. Unlike traditional cheesecakes that require hours of baking and cooling, this version cuts all that fuss while still delivering that decadent flavor. One bite transports you to summer picnics and family reunions, allowing you to enjoy a classic dessert in a simpler, more accessible form. Plus, it’s a great last-minute treat for gatherings!
The Complete Cooking Journey
Making this cheesecake feels more like a delightful assembly rather than cooking, allowing you to get creative. With no fuss about timing the bake or hoping for the perfect fluffiness, you mix, whip, fold, and chill—it’s like crafting a memory rather than baking a dessert. So let’s prepare to embark on this tasty journey!
Ingredients:
- 2 cups graham cracker crumbs
- 1/2 cup unsalted butter, melted
- 1 cup powdered sugar
- 1 (8 oz) package cream cheese, softened
- 1 cup heavy whipping cream
- 1 teaspoon vanilla extract
- 1 can (21 oz) cherry pie filling
Method:
Step 1: Create the Graham Cracker Crust
In a bowl, combine graham cracker crumbs and melted butter until well blended. Press mixture into the bottom of a 9-inch springform pan to form the crust.
Step 2: Make the Cream Cheese Mixture
In a separate bowl, beat the cream cheese and powdered sugar until smooth.
Step 3: Whip the Cream
In another bowl, whip the heavy cream and vanilla extract until stiff peaks form.
Step 4: Fold Cream into Cream Cheese Mixture
Fold the whipped cream into the cream cheese mixture until fully combined, ensuring a light and airy texture.
Step 5: Assemble the Cheesecake
Spread the cream cheese mixture over the crust in the springform pan, smoothing it out to create an even layer.
Step 6: Top with Cherry Pie Filling
Carefully top with cherry pie filling, allowing it to spread naturally across the surface to create a pretty, colorful finish.
Step 7: Chill Until Set
Refrigerate for at least 4 hours, or until set. This helps the flavors meld beautifully.
Step 8: Serve Chilled
When ready, slice your cheesecake and serve chilled, taking in every creamy, dreamy bite!
Serving Suggestions & Pairings
This cheesecake is perfect on its own but pairs wonderfully with a dollop of fresh whipped cream or a sprinkle of toasted coconut for a tropical twist. Serve it alongside freshly brewed coffee or a glass of sweet iced tea—it’s a versatile dessert that complements any beverage!
Storage & Leftovers Guide
Store any leftovers in an airtight container in the refrigerator for up to 3 days. While this cheesecake is best fresh, the flavors deepen over time, making it a delightful treat to revisit.
Kitchen Wisdom & Success Tips
-
Soften your cream cheese: Take it out of the fridge an hour before you start. This makes it easier to blend and results in a smoother texture.
-
Don’t over-whip the cream: Stop whipping as soon as you reach stiff peaks. Over-whipping can turn it grainy.
-
Use a serrated knife for slicing to get clean cuts without disturbing the layers.
Flavor Variations & Adaptations
- Chocolate Cherry Cheesecake: Drizzle melted chocolate on top of the cheesecake before adding the cherry filling for a decadent touch.
- Fruit Variants: Swap cherry pie filling for fresh berries, or try a blueberry or peach topping instead.
- Nutty Crust Alternative: Add some finely chopped nuts to the crust for added texture and flavor.
Reader Questions & Solutions
- Can I use low-fat cream cheese? Yes, low-fat cream cheese works, but the consistency might be slightly different.
- How can I ensure my cheesecake sets properly? Refrigerate for at least 4 hours; overnight is even better for the best texture.
- What can I substitute for heavy cream? Whole milk mixed with a bit of cornstarch may work but won’t yield as rich a texture.
- Can this cheesecake be frozen? Yes! You can freeze it for up to a month, but it’s best to add the topping after thawing.
- Can I make this in advance for a party? Absolutely! You can prepare it a day or two ahead and store it in the fridge until serving.
Wrapping Up
This No Bake Cherry Cheesecake is not just a dessert; it’s an invitation to relive cherished moments and create new memories in your kitchen. With each slice, you get a taste of nostalgia and simplicity! So grab those ingredients, summon your inner baker, and let’s whip up something deliciously easy, shall we? Happy cooking, and enjoy the journey to a sweet finish!
PrintNo Bake Cherry Cheesecake
A delicious and simple no bake cheesecake topped with cherry pie filling, perfect for any gathering.
- Prep Time: 20 minutes
- Cook Time: 20 minutes
- Total Time: 260 minutes
- Yield: 8 servings 1x
- Category: Dessert
- Method: No Bake
- Cuisine: American
- Diet: Vegetarian
Ingredients
- 2 cups graham cracker crumbs
- 1/2 cup unsalted butter, melted
- 1 cup powdered sugar
- 1 (8 oz) package cream cheese, softened
- 1 cup heavy whipping cream
- 1 teaspoon vanilla extract
- 1 can (21 oz) cherry pie filling
Instructions
- Create the Graham Cracker Crust: Combine graham cracker crumbs and melted butter until well blended and press into the bottom of a 9-inch springform pan.
- Make the Cream Cheese Mixture: Beat cream cheese and powdered sugar until smooth.
- Whip the Cream: In another bowl, whip the heavy cream and vanilla extract until stiff peaks form.
- Fold Cream into Cream Cheese Mixture: Gently fold the whipped cream into the cream cheese mixture until fully combined.
- Assemble the Cheesecake: Spread the cream cheese mixture over the crust in the springform pan.
- Top with Cherry Pie Filling: Carefully top with cherry pie filling, allowing it to spread naturally.
- Chill Until Set: Refrigerate for at least 4 hours until set.
- Serve Chilled: Slice the cheesecake and serve chilled.
Notes
For a tropical twist, serve with whipped cream or toasted coconut. Best served with coffee or iced tea.
Nutrition
- Serving Size: 1 slice
- Calories: 310
- Sugar: 14g
- Sodium: 145mg
- Fat: 19g
- Saturated Fat: 11g
- Unsaturated Fat: 8g
- Trans Fat: 0g
- Carbohydrates: 37g
- Fiber: 1g
- Protein: 4g
- Cholesterol: 40mg