
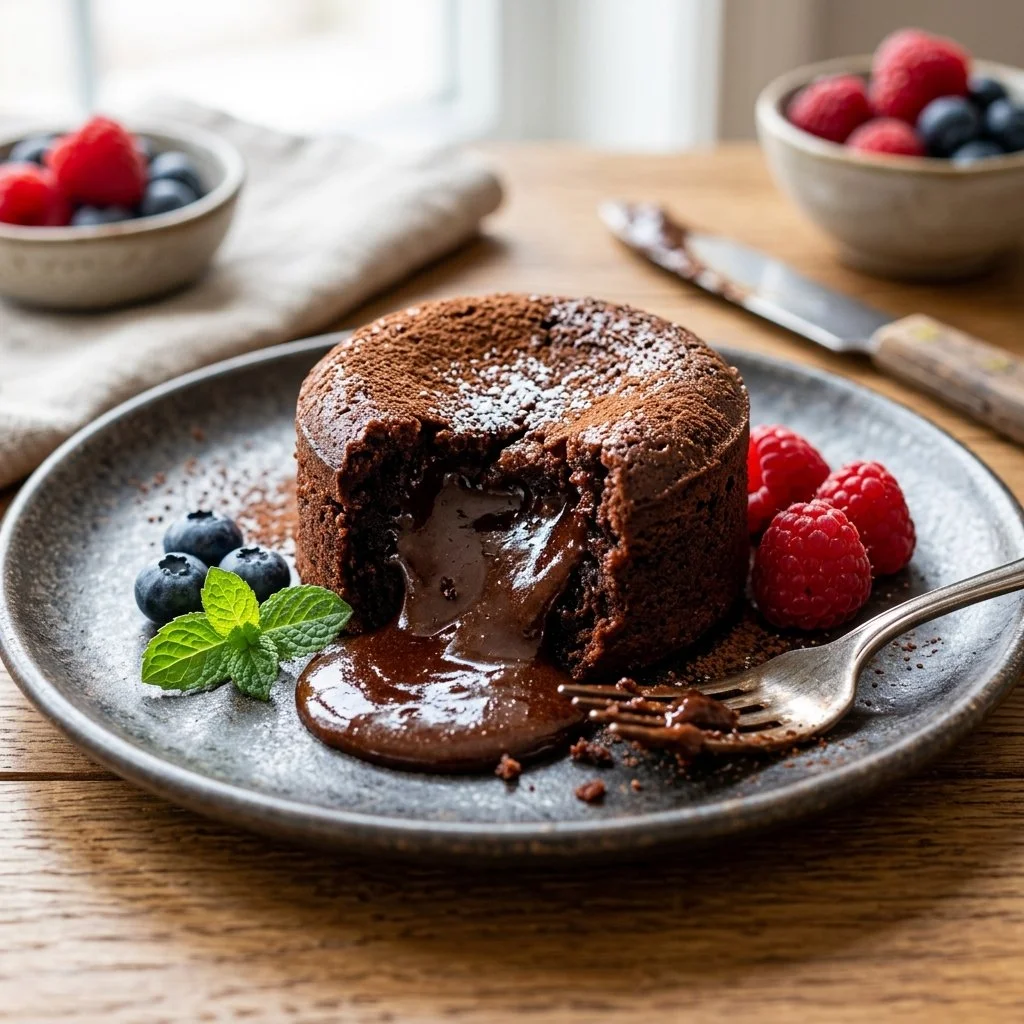
There’s something truly magical about a Chocolate Lava Cake, isn’t there? Just imagine slicing into that rich, tender exterior only for a warm, molten center of chocolate to flow out like a sweet river. I still remember the first time I made this dessert for my family. The gasps of delight were palpable, and not just from the kids! Watching the joy on their faces as they dug into this decadent treat was a heartwarming reminder of the sheer joy that comes from baking. Each bite was a whisper of love, a sprinkle of nostalgia, and an echo of laughter. If you haven’t yet experienced the wonder of Chocolate Lava Cake, today is the perfect day to make this deliciously indulgent dessert that never fails to create memorable moments.
Recipe Timing
- Prep Duration: 10 minutes
- Active Cooking: 14 minutes
- Total Duration: 24 minutes
- Portion Size: Serves 4
- Complexity: Simple
Nutritional Recipe
- Calories per portion: Approximately 360
- Protein: 6g per serving
- Carbs: 37g per serving
- Fats: 23g per serving
- Fiber: 1g per serving
- Sugars: 28g per serving
- Sodium: 150mg per serving
Why You’ll Love This Chocolate Lava Cake
This Chocolate Lava Cake is not just a dessert; it’s an experience. The simplicity of ingredients belies the complexity of flavor that awaits you. With a rich, chocolaty taste and that iconic gooey center, it’s truly a chocoholic’s dream come true. It’s perfect for any occasion, from cozy date nights to celebratory feasts. Plus, it’s incredibly quick to whip up, making it an ideal last-minute dessert. Who wouldn’t want to impress their guests with a homemade treat that feels like a restaurant-quality indulgence?
The Complete Cooking Journey
Let’s take a step-by-step journey through preparing this lava cake, and trust me, it’s as easy as it is rewarding. Gather your ingredients, preheat your oven, and let’s melt the chocolate into a silky concoction that will have your taste buds singing. Follow along, and soon enough, you’ll have a dessert that not only satisfies cravings but also warms the heart.
Ingredients:
- 1/2 cup unsalted butter
- 1 cup semi-sweet chocolate chips
- 1 cup powdered sugar
- 2 large eggs
- 2 large egg yolks
- 1 teaspoon vanilla extract
- 1/2 cup all-purpose flour
- Pinch of salt
Method:
Step 1: Preheat the Oven and Prepare Ramekins
Preheat the oven to 425°F (220°C) and grease your ramekins well to ensure the lava cakes release easily after baking.
Step 2: Melt the Chocolate and Butter
In a microwave-safe bowl, melt the butter and chocolate chips together in the microwave. Heat in short intervals, stirring in between until smooth and glossy.
Step 3: Add the Sweetness
Stir in the powdered sugar until well combined with the chocolate mixture, creating a luscious blend of flavors.
Step 4: Whisk in the Eggs
Whisk in the whole eggs and egg yolks along with the vanilla extract until the mixture is fully combined and silky.
Step 5: Incorporate Dry Ingredients
Gently fold in the all-purpose flour and a pinch of salt until just combined. Be careful not to overmix; we want to keep that cake tender.
Step 6: Fill the Ramekins
Pour the rich chocolate mixture into the prepared ramekins, filling them about three-quarters full to allow room for rising.
Step 7: Bake to Perfection
Bake for 12-14 minutes or until the edges are firm but the center remains soft. The aroma wafting through your kitchen will be an irresistible invitation.
Step 8: Cool and Serve
Allow the cakes to cool for 1 minute, then carefully invert onto plates. One gentle tap should release your lava cakes, revealing that creamy center. Serve immediately, ideally with a scoop of vanilla ice cream for the ultimate treat.
Serving Suggestions & Pairings
These Chocolate Lava Cakes shine brightly on their own but can be elevated with a scoop of vanilla ice cream or a dollop of freshly whipped cream. Add fresh berries or a drizzle of chocolate sauce for extra flair. They make a stunning centerpiece for a dinner party or a cozy movie night dessert.
Storage & Leftovers Guide
While these cakes are best enjoyed fresh, you can store any leftovers in an airtight container in the refrigerator for up to 2 days. To enjoy them again, simply reheat in the microwave for about 15-20 seconds to warm the centers once more.
Kitchen Wisdom & Success Tips
- Make sure not to overbake; the beauty of a lava cake lies in its gooey center!
- Don’t skip greasing the ramekins; it ensures a clean release for that perfect presentation.
- Feel free to experiment with different chocolate types—dark or even white chocolate can offer a unique twist.
Flavor Variations & Adaptations
- Add a dash of espresso powder to enhance the chocolate flavor.
- Include a filling of peanut butter or Nutella for an exciting surprise in the center.
- Try a gluten-free version by substituting the all-purpose flour with a gluten-free blend.
Reader Questions & Solutions
-
What can I do if my lava cake didn’t ooze?
- If it’s overbaked, it might not ooze properly. Start checking for doneness at the 12-minute mark.
-
Can I use other chocolates?
- Absolutely! You can use dark, milk, or even white chocolate; just adjust sugar levels if needed.
-
How do I know if my cake is done?
- The edges should look set, but the center should still jiggle slightly.
-
Can I make these ahead of time?
- You can prepare them and refrigerate unbaked, then bake straight from the fridge—just add an extra minute to the bake time.
-
What should I serve with lava cakes?
- Vanilla ice cream, fresh berries, or a dusting of powdered sugar complement them beautifully!
Wrapping Up
There you have it—a simple yet delectable Chocolate Lava Cake recipe that is sure to leave you—and anyone you share it with—swooning. This delightfully rich dessert is a testament to the magic of baking, and I encourage you to experience the joy of creating it. Whether for a special occasion or just because, these little chocolate miracles are bound to impress. Bake this and watch everyone’s eyes light up with delight—it’s a moment worth savoring! Happy baking!
PrintChocolate Lava Cake
Indulge in a rich Chocolate Lava Cake with a warm, gooey center that captivates every chocoholic.
- Prep Time: 10 minutes
- Cook Time: 14 minutes
- Total Time: 24 minutes
- Yield: 4 servings 1x
- Category: Dessert
- Method: Baking
- Cuisine: American
- Diet: Vegetarian
Ingredients
- 1/2 cup unsalted butter
- 1 cup semi-sweet chocolate chips
- 1 cup powdered sugar
- 2 large eggs
- 2 large egg yolks
- 1 teaspoon vanilla extract
- 1/2 cup all-purpose flour
- Pinch of salt
Instructions
- Preheat the oven to 425°F (220°C) and grease your ramekins well.
- Melt the butter and chocolate chips together in a microwave-safe bowl until smooth and glossy.
- Stir in the powdered sugar until well combined.
- Whisk in the whole eggs, egg yolks, and vanilla extract until fully combined.
- Fold in the all-purpose flour and a pinch of salt until just combined.
- Pour the mixture into prepared ramekins, filling them about three-quarters full.
- Bake for 12-14 minutes until the edges are firm but the center remains soft.
- Cool for 1 minute, then invert onto plates and serve immediately.
Notes
Serve with vanilla ice cream or fresh berries for an enhanced dessert experience.
Nutrition
- Serving Size: 1 serving
- Calories: 360
- Sugar: 28g
- Sodium: 150mg
- Fat: 23g
- Saturated Fat: 14g
- Unsaturated Fat: 9g
- Trans Fat: 0g
- Carbohydrates: 37g
- Fiber: 1g
- Protein: 6g
- Cholesterol: 170mg