
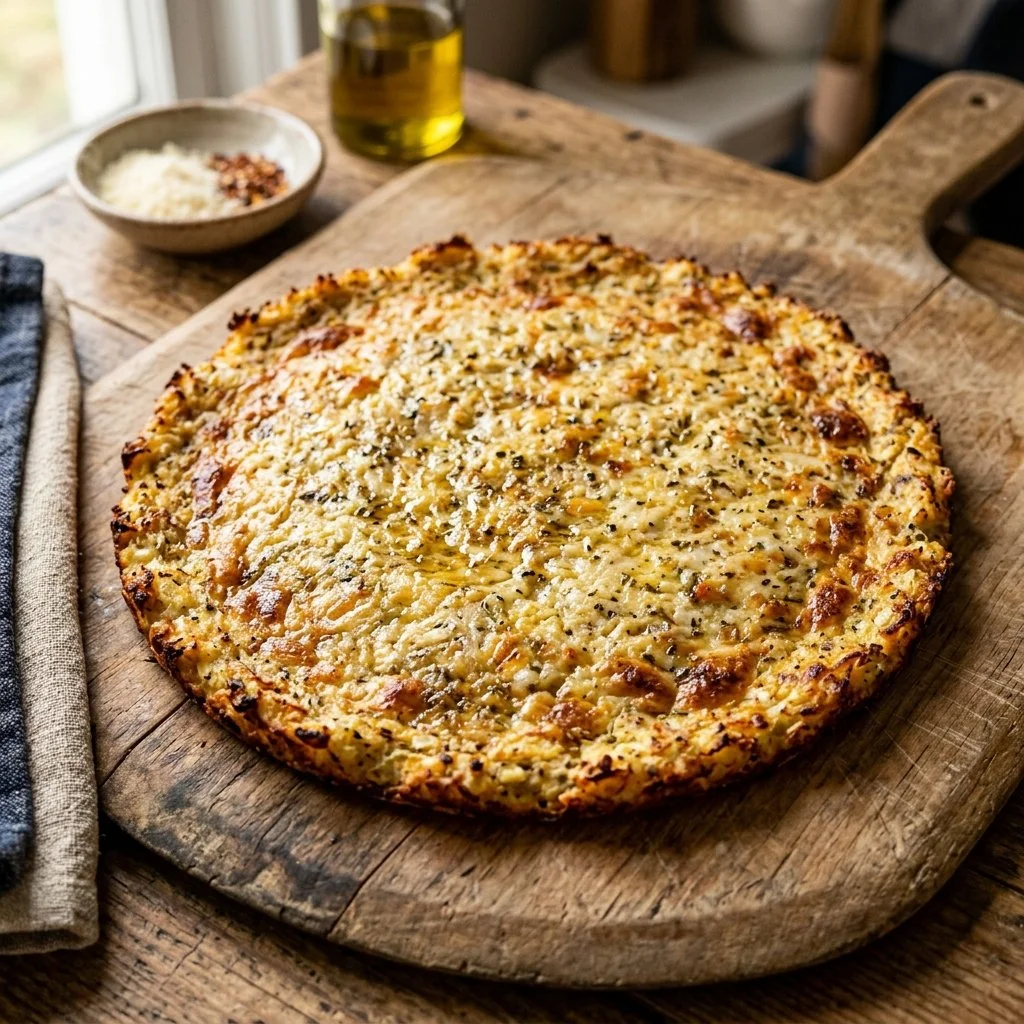
There’s something undeniably magical about pizza. The crispy crust, the melty cheese, the array of tantalizing toppings—it’s a culinary canvas where creativity knows no bounds. However, as much as I adore a good slice, the guilt after indulging in a heavy pizza can weigh me down. That’s when I discovered the wondrous world of cauliflower pizza crust—a delightful, guilt-free alternative that doesn’t sacrifice the love I have for pizza. Each bite is a glorious testament to how versatile vegetables can be, transforming the humble cauliflower into a deliciously crispy base for all my favorite toppings.
Recipe Timing
- Prep Duration: 15 minutes
- Active Cooking: 30-40 minutes
- Total Duration: 45-55 minutes
- Portion Size: Serves 2-4 (depending on appetite)
- Complexity: Simple
Nutritional Recipe
- Calories per portion: Approximately 150
- Protein: 10 grams
- Carbs: 8 grams
- Fats: 9 grams
- Fiber: 3 grams
- Sugars: 2 grams
- Sodium: 350 mg
Why You’ll Love This Cauliflower Pizza Crust
If you’ve ever felt the weight of doughy pizza crust sitting heavily in your stomach or worried about those extra calories creeping in, this cauliflower pizza crust will change your life. It’s not only gluten-free, but it also packs in a nutritious punch. You get the flavor without the guilt, and it pairs beautifully with whatever toppings you choose—from classic margherita to inventive veggie extravaganzas. Plus, it’s a fantastic way to sneak in more veggies into your diet without feeling deprived or indulging in a sad salad.
The Complete Cooking Journey
Making your own cauliflower pizza crust is as satisfying as it is simple. It starts with transforming your cauliflower into a rice-like texture. The secret to a splendid crust is all in how you prepare your cauliflower; removing excess moisture is key. After that, it’s a matter of combining your easy-to-find ingredients, baking until crispy, and then layering on your favorite toppings. With just a few steps, you’ll have a golden, crispy base ready for any flavor profile your heart desires.
Ingredients:
- 1 medium cauliflower head
- 1/2 cup shredded mozzarella cheese
- 1/4 cup grated parmesan cheese
- 1 egg
- 1 teaspoon garlic powder
- 1 teaspoon dried oregano
- Salt and pepper to taste
Method:
Step 1: Preheat the Oven
Preheat your oven to 425°F (220°C). The perfect temperature to ensure a nice, crunchy crust!
Step 2: Prepare the Cauliflower
Trim the cauliflower, removing the leaves and stems, then cut it into florets. This prepares our star ingredient for the spotlight!
Step 3: Pulse the Cauliflower
In a food processor, pulse the cauliflower until it resembles rice. This process is the cornerstone that sets the stage for our crust.
Step 4: Remove Excess Moisture
Transfer the cauliflower rice to a clean kitchen towel and squeeze out the excess moisture. Don’t skip this step—it’s what guarantees a crispy crust!
Step 5: Mix Ingredients
In a bowl, combine the cauliflower, mozzarella cheese, parmesan cheese, egg, garlic powder, oregano, salt, and pepper. Mix well until all ingredients are evenly combined; this mixes the flavors beautifully.
Step 6: Form the Crust
Spread the mixture out on a parchment-lined baking sheet, forming a crust shape. Don’t worry about making it perfect; a rustic shape adds character!
Step 7: Bake Until Golden
Bake for 25-30 minutes until golden and firm. This is where the magic happens, as the crust transforms into a beautiful golden-brown base.
Step 8: Add Toppings and Final Bake
Add your desired toppings and bake for an additional 10 minutes. The finishing touch is crucial—let those toppings melt and mingle together!
Serving Suggestions & Pairings
Serve your cauliflower pizza crust warm and fresh from the oven! Pair it with a light arugula salad dressed with lemon and olive oil or some roasted veggies on the side for a wholesome meal. A slice of your favorite wine or a fizzy seltzer can elevate your pizza night to a whole new level.
Storage & Leftovers Guide
If you find yourself with any leftover crust, store it in an airtight container in the fridge for up to three days. You can reheat it in the oven for a few minutes to bring back the crunchy texture. Alternatively, it freezes well; just be sure to wrap it tightly!
Kitchen Wisdom & Success Tips
- Choosing Cauliflower: Look for a firm, fresh cauliflower head without brown spots.
- Food Processor Tip: If you don’t have a food processor, you can grate the cauliflower using a box grater—just a bit more elbow grease needed!
- Prevent Soggy Crust: Ensure you squeeze out as much moisture as possible, and avoid using watery toppings like fresh tomatoes unless you cook the sauce down first.
Flavor Variations & Adaptations
Feel free to experiment! Add fresh herbs like basil or thyme into the mix for added flavor. You can also swap out the cheese for a dairy-free alternative if you’re looking for a vegan option. For a spicy kick, try mixing in some crushed red pepper flakes or using spicy sausage as a topping.
Reader Questions & Solutions
-
Question: My crust always comes out too soggy. What am I doing wrong?
Solution: The most common issue is not removing enough moisture from the cauliflower. Make sure to squeeze it thoroughly in a kitchen towel! -
Question: Can I prepare the crust in advance?
Solution: Absolutely! Prepare the crust up to baking and store it in the fridge or freeze it. Just allow it to cool completely before storing. -
Question: Can I use frozen cauliflower rice instead?
Solution: Yes! Just make sure it’s fully thawed and drained well before using it in the recipe. -
Question: What are some good toppings to use?
Solution: A classic combo would be pepperoni and mozzarella, or for a veggie option, try bell peppers, onions, and spinach. -
Question: How do I know when the crust is done?
Solution: The crust should be golden brown and firm to the touch. If it feels too soft, give it a few extra minutes in the oven!
Wrapping Up
Making cauliflower pizza crust is not only a fun cooking project but also a healthier twist on a beloved comfort food. With its crispy texture and endless topping possibilities, it invites you to get creative in the kitchen. So why not dive in? Try it out and let the flavors unfold. Happy cooking, and may your pizza nights be forever delightful!
PrintCauliflower Pizza Crust

A delightful, guilt-free alternative to traditional pizza crust made from cauliflower, perfect for any topping.
- Prep Time: 15 minutes
- Cook Time: 30 minutes
- Total Time: 45 minutes
- Yield: 4 servings 1x
- Category: Main Course
- Method: Baking
- Cuisine: Italian
- Diet: Gluten-Free
Ingredients
- 1 medium cauliflower head
- 1/2 cup shredded mozzarella cheese
- 1/4 cup grated parmesan cheese
- 1 egg
- 1 teaspoon garlic powder
- 1 teaspoon dried oregano
- Salt and pepper to taste
Instructions
- Preheat your oven to 425°F (220°C).
- Trim the cauliflower, removing the leaves and stems, then cut it into florets.
- Pulse the cauliflower in a food processor until it resembles rice.
- Transfer the cauliflower rice to a clean kitchen towel and squeeze out the excess moisture.
- Combine the cauliflower, mozzarella cheese, parmesan cheese, egg, garlic powder, oregano, salt, and pepper in a bowl.
- Spread the mixture on a parchment-lined baking sheet, forming a crust shape.
- Bake for 25-30 minutes until golden and firm.
- Add your desired toppings and bake for an additional 10 minutes.
Notes
Ensure to squeeze out as much moisture from the cauliflower as possible for a crispy crust.
Nutrition
- Serving Size: 1 serving
- Calories: 150
- Sugar: 2g
- Sodium: 350mg
- Fat: 9g
- Saturated Fat: 4g
- Unsaturated Fat: 4g
- Trans Fat: 0g
- Carbohydrates: 8g
- Fiber: 3g
- Protein: 10g
- Cholesterol: 30mg