
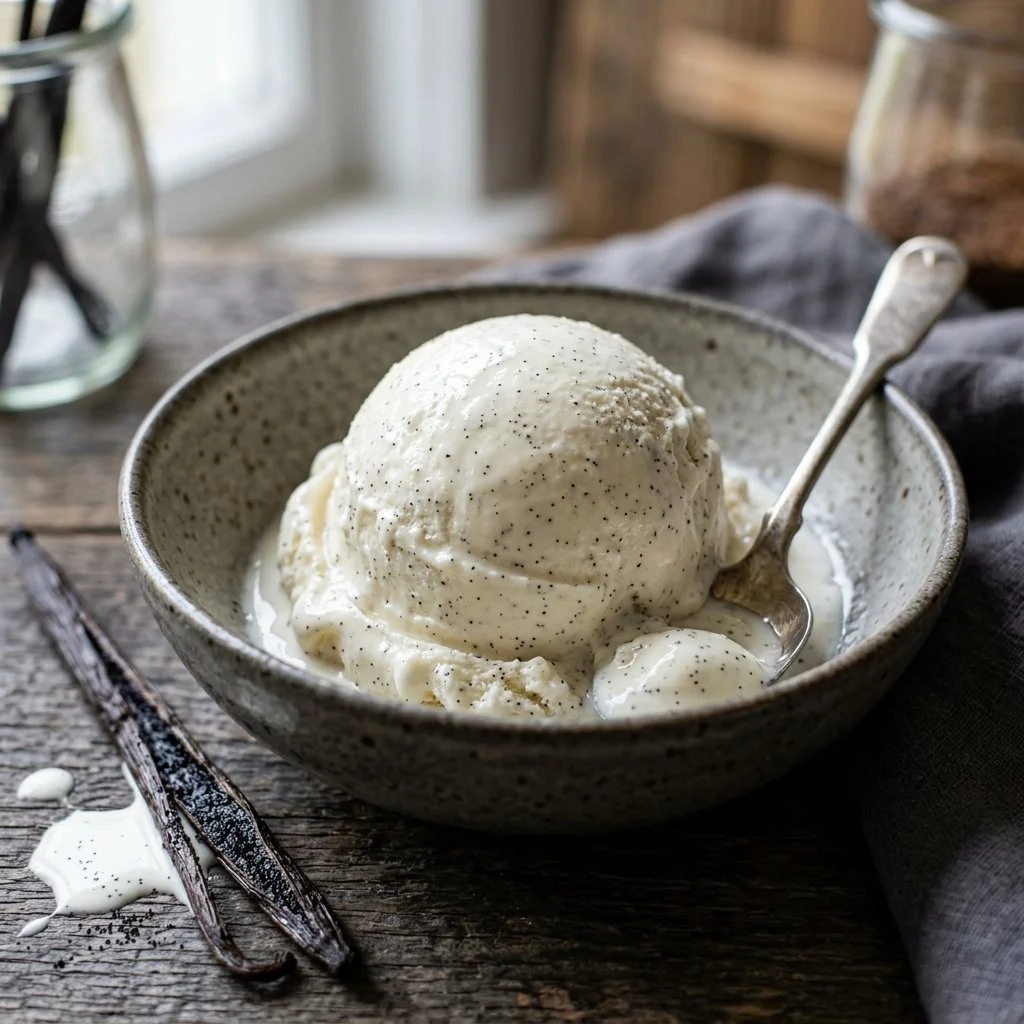
There’s something truly magical about the first scoop of homemade ice cream on a warm summer day. As a child, I remember summer afternoons spent at my grandmother’s house, where she’d pull out her old ice cream maker, the motor buzzing with excitement. With each turn, we’d eagerly anticipate the creamy goodness about to be revealed. Among all the flavors, her vanilla bean ice cream stood out like a timeless classic, rich and aromatic, a comforting embrace in a bowl. Today, I’m inviting you to recreate that cherished experience in your own kitchen—without the need for a time machine!
Recipe Timing
- Prep Duration: 20 minutes
- Active Cooking: 15 minutes
- Total Duration: At least 4 hours (plus chilling and freezing time)
- Portion Size: Serves about 8
- Complexity: Simple
Nutritional Recipe
- Calories per portion: Approximately 300
- Protein: 4g per serving
- Carbs: 28g per serving
- Fats: 20g per serving
- Fiber: 0g per serving
- Sugars: 20g per serving
- Sodium: 50mg per serving
Why You’ll Love This Homemade Vanilla Bean Ice Cream
This isn’t just any ice cream; it’s a creamy, dreamy, decadent experience that will change the way you think about frozen treats. The inclusion of real vanilla bean brings an unmatched depth of flavor, while the option of a custard base adds a rich, velvety texture that you simply can’t find in store-bought varieties. Just imagine scooping out the silky, vanilla-scented ice cream into a bowl and watching it melt slightly, pooling sweet creaminess that beckons you for the first taste. Trust me, your taste buds will thank you!
The Complete Cooking Journey
Making homemade vanilla bean ice cream is not only rewarding but also straightforward! The steps are simple and allow you to take ownership of the flavors. Let’s go on this delicious journey together!
Ingredients:
- 2 cups heavy cream
- 1 cup whole milk
- 3/4 cup granulated sugar
- 1 vanilla bean (split and scraped)
- 1 teaspoon vanilla extract
- 1 pinch of salt
- Egg yolks from 5 large eggs (optional for custard base)
Method:
Step 1: Combine the Creamy Base
In a medium saucepan, combine the heavy cream, whole milk, sugar, salt, and the vanilla bean seeds along with the pod. Heat the mixture over medium heat until it is hot but not boiling.
Step 2: Temper the Egg Yolks
If using egg yolks, whisk them in a separate bowl. Gradually add a small amount of the hot cream mixture to the egg yolks, whisking constantly to temper. Then, pour the egg yolk mixture back into the saucepan.
Step 3: Cook Until Thickened
Cook over low heat, stirring constantly, until the mixture thickens enough to coat the back of a spoon. Remove from heat and stir in vanilla extract.
Step 4: Strain for Smoothness
Strain the mixture through a fine sieve into a bowl, discarding the vanilla pod. This ensures a smooth, creamy texture in your final product.
Step 5: Cool and Chill
Let it cool to room temperature, then refrigerate until completely chilled, at least 4 hours or overnight. Patience is key here!
Step 6: Churn to Perfection
Pour the chilled mixture into an ice cream maker and churn according to the manufacturer’s instructions until it achieves a soft-serve consistency.
Step 7: Freeze and Firm Up
Once churned, transfer to a container and freeze until firm, about 4 hours. This step will transform your creation into the perfect scoopable delight!
Serving Suggestions & Pairings
Serve your homemade vanilla bean ice cream in delightful bowls or elegant cones. You can enhance each scoop with a drizzle of rich chocolate syrup, a sprinkle of crushed nuts, or a handful of fresh berries. It’s also perfect alongside warm desserts like brownies or pie, adding an indulgent contrast to every bite.
Storage & Leftovers Guide
Your delicious homemade ice cream can be stored in an airtight container in the freezer for up to two weeks. Just be sure to let it sit at room temperature for a few minutes before scooping, if it’s too hard!
Kitchen Wisdom & Success Tips
- Mix it Up: Don’t be afraid to experiment! Try infusing other flavors like mint or coffee by steeping fresh herbs or coffee beans in your cream mixture during step one.
- Exact Tempering: Take care when tempering your egg yolks; too hot, and you’ll end up with scrambled eggs. Gradually adding the hot mixture helps prevent this!
- Make Ahead: This ice cream is the perfect make-ahead treat for parties. Prepare it the night before for a hassle-free dessert on the big day!
Flavor Variations & Adaptations
Get creative by adding swirls of fudge, cookie crumbs, or fresh fruit during the churning process. You can swap out whole milk for coconut milk for a dairy-free version, or even infuse flavors like lavender for something extra special!
Reader Questions & Solutions
-
How can I make this recipe dairy-free?
- Use coconut cream and almond milk instead of heavy cream and whole milk.
-
What if I don’t have an ice cream maker?
- No problem! Pour the chilled mixture into a shallow dish and freeze. Stir every 30 minutes for 2-3 hours until it’s creamy.
-
Can I use vanilla extract instead of a vanilla bean?
- Yes! Use 2 teaspoons of pure vanilla extract, but keep in mind you’ll miss out on those beautiful speckles and depth of flavor.
-
What’s the best way to store homemade ice cream?
- Ensure it’s in an airtight container with minimal air space to prevent ice crystals from forming.
-
How long does homemade ice cream last?
- It’s best enjoyed within two weeks, but can last up to a month if stored properly.
Wrapping Up
Homemade vanilla bean ice cream is more than just a recipe; it’s a nostalgic experience waiting to unfold in your kitchen. With each spoonful, you’ll taste the love and effort you put into making it. So gather your ingredients, turn up your favorite tunes, and dive into this culinary adventure that promises to delight both the young and the young at heart. Remember: true happiness is homemade! Enjoy every creamy bite!
PrintHomemade Vanilla Bean Ice Cream
A creamy and dreamy homemade vanilla bean ice cream that brings nostalgia of summer afternoons.
- Prep Time: 20 minutes
- Cook Time: 15 minutes
- Total Time: 240 minutes
- Yield: 8 servings 1x
- Category: Dessert
- Method: Churning
- Cuisine: American
- Diet: Vegetarian
Ingredients
- 2 cups heavy cream
- 1 cup whole milk
- 3/4 cup granulated sugar
- 1 vanilla bean (split and scraped)
- 1 teaspoon vanilla extract
- 1 pinch of salt
- Egg yolks from 5 large eggs (optional for custard base)
Instructions
- Combine the heavy cream, whole milk, sugar, salt, and vanilla bean seeds in a medium saucepan. Heat until hot but not boiling.
- Whisk egg yolks in a separate bowl (if using). Gradually add hot cream mixture to temper, then return to saucepan.
- Cook over low heat, stirring constantly, until thick enough to coat the back of a spoon. Remove from heat and stir in vanilla extract.
- Strain the mixture through a fine sieve into a bowl, discarding the vanilla pod.
- Cool to room temperature, then refrigerate until completely chilled, at least 4 hours or overnight.
- Pour the chilled mixture into an ice cream maker and churn as per instructions until soft-serve consistency.
- Transfer to a container and freeze until firm, about 4 hours.
Notes
Serve with chocolate syrup, crushed nuts, or fresh berries. Store in an airtight container for up to two weeks.
Nutrition
- Serving Size: 1 serving
- Calories: 300
- Sugar: 20g
- Sodium: 50mg
- Fat: 20g
- Saturated Fat: 12g
- Unsaturated Fat: 8g
- Trans Fat: 0g
- Carbohydrates: 28g
- Fiber: 0g
- Protein: 4g
- Cholesterol: 100mg