
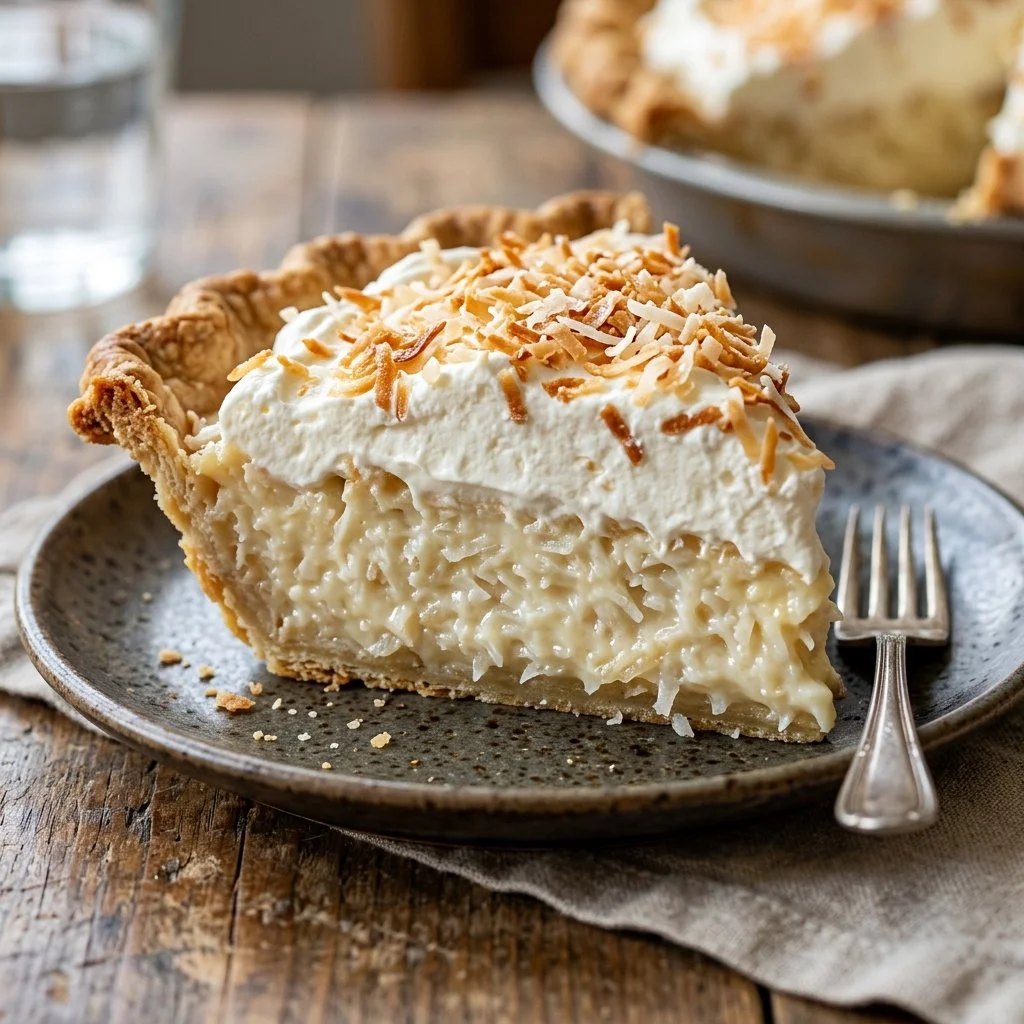
There’s a certain magic in baking—a moment when the mundane transforms into something extraordinary. The smell of a freshly baked pie wafting through the house has a way of making everything feel right in the world. For me, coconut cream pie holds a special place in my heart as it reminds me of summers spent at my grandmother’s kitchen table, where tall mountains of whipped cream crowned rich, luscious custard. Every slice was a little piece of tropical paradise, exploding with the familiar taste of sweet coconut.
Recipe Timing
- Prep Duration: 20 minutes
- Active Cooking: 15 minutes
- Total Duration: 4 hours 35 minutes (including chilling time)
- Portion Size: Serves 8
- Complexity: Simple
Nutritional Recipe
- Calories per portion: Approximately 380
- Protein: 4g
- Carbs: 35g
- Fats: 25g
- Fiber: 1g
- Sugars: 22g
- Sodium: 200mg
Why You’ll Love This Coconut Cream Pie
This Coconut Cream Pie is not just a dessert; it’s a nostalgic journey. Each bite melds the sweetness of cream with a delightful crunch from the pie crust and a comforting texture that feels like a warm hug. The sweetness of the coconut and the rich, creamy filling create a symphony of flavors that you won’t soon forget. Top it off with fluffy whipped cream, and you’ve got a slice of heaven that’s perfect for any occasion—be it a family gathering, holiday feast, or just a cozy night in.
The Complete Cooking Journey
Creating a coconut cream pie is an exercise in patience and love. You’ll first craft a velvety, coconut-infused custard, then pour it into a pre-baked pie crust, where it will set and chill into a beautiful pie. Finally, you crown it with whipped cream and shower it with more coconut for that extra flair.
Ingredients:
- 1 pre-baked pie crust
- 1 cup sweetened shredded coconut
- 1 cup heavy cream
- 3/4 cup sugar
- 1/4 cup cornstarch
- 1/4 teaspoon salt
- 2 cups milk
- 3 large egg yolks
- 1 teaspoon vanilla extract
- Whipped cream (for topping)
Method:
### Step 1: Combine Dry Ingredients
In a saucepan, combine the sugar, cornstarch, and salt. Gradually whisk in the milk, stirring to ensure there are no lumps.
### Step 2: Cook Until Thickened
Cook the mixture over medium heat, stirring constantly until it thickens and comes to a gentle boil. This should take about 5-7 minutes.
### Step 3: Temper the Egg Yolks
In a bowl, beat the egg yolks. Gradually stir in a little of the hot mixture from the saucepan—this process, called tempering, prevents the eggs from scrambling.
### Step 4: Combine and Continue Cooking
Pour the egg yolk mixture back into the saucepan with the rest of the hot custard. Cook for another 2 minutes while stirring continuously until the mixture is smooth and thickened.
### Step 5: Add Coconut and Flavor
Remove the saucepan from heat and stir in the vanilla extract and the shredded coconut. The smell will be heavenly!
### Step 6: Fill the Pie Crust
Pour the luscious coconut filling into the pre-baked pie crust. Spread it evenly and cover it to chill.
### Step 7: Chill and Serve
Refrigerate the pie for at least 4 hours or until set. Before serving, top generously with whipped cream and sprinkle additional shredded coconut on top for decoration.
Serving Suggestions & Pairings
This Coconut Cream Pie pairs beautifully with a cup of hot coffee or a refreshing iced tea. Want to elevate the dessert? Serve it alongside fresh pineapple slices or a scoop of vanilla ice cream for an extra tropical touch!
Storage & Leftovers Guide
To keep your pie fresh, cover it with plastic wrap or store it in an airtight container. It will stay good in the refrigerator for up to 3 days. The pie might lose some fluffiness due to the whipped cream, but the flavors will still be just as delightful.
Kitchen Wisdom & Success Tips
- Pre-baked Pie Crust: Ensure your crust is completely cooled before adding the filling to prevent it from getting soggy.
- Whip Your Cream: For fluffier whipped cream, chill your bowl and beaters beforehand.
- Coconut Investments: Use a high-quality shredded coconut for the best texture and flavor.
Flavor Variations & Adaptations
Feel free to play around with flavors! Add a bit of lime juice or zest for a zesty twist or mix in some dark chocolate chips for a decadent layer of surprise. You could also swap half the coconut for crushed Oreos for an intriguing flavor combination!
Reader Questions & Solutions
-
Why is my coconut cream filling watery?
This can happen if it hasn’t cooked long enough or if the cornstarch wasn’t mixed thoroughly. Ensure you stick to the cooking times and stir consistently. -
Can I use coconut milk instead of regular milk?
Absolutely! Coconut milk will enhance the coconut flavor even more, making your pie extra dreamy. -
What can I substitute for heavy cream?
If you’re looking for a lighter option, consider using half-and-half, or for a dairy-free version, try coconut cream! -
How do I prevent the pie crust from shrinking?
Make sure to properly chill your crust before baking. You can also weigh it down with pie weights during the initial baking. -
Can I make this ahead of time?
Yes! This pie can be made a day or two in advance, just remember to wait on the whipped cream topping until right before serving for the best texture.
Wrapping Up
This Coconut Cream Pie transcends mere dessert—it’s an experience in itself, filled with nostalgia and joy. I hope this recipe finds its way into your kitchen, bringing warmth and sweetness to your family table. So gather the ingredients, roll up your sleeves, and let the magic of coconut cream pie transport you to sunlit summers and blissful moments. Happy baking!
PrintCoconut Cream Pie

A nostalgic coconut cream pie bursting with sweet flavors and topped with fluffy whipped cream.
- Prep Time: 20 minutes
- Cook Time: 15 minutes
- Total Time: 275 minutes
- Yield: 8 servings 1x
- Category: Dessert
- Method: Chilling
- Cuisine: American
- Diet: Vegetarian
Ingredients
- 1 pre-baked pie crust
- 1 cup sweetened shredded coconut
- 1 cup heavy cream
- 3/4 cup sugar
- 1/4 cup cornstarch
- 1/4 teaspoon salt
- 2 cups milk
- 3 large egg yolks
- 1 teaspoon vanilla extract
- Whipped cream (for topping)
Instructions
- Combine Dry Ingredients: In a saucepan, combine the sugar, cornstarch, and salt. Gradually whisk in the milk, stirring to ensure there are no lumps.
- Cook Until Thickened: Cook the mixture over medium heat, stirring constantly until it thickens and comes to a gentle boil. This should take about 5-7 minutes.
- Temper the Egg Yolks: In a bowl, beat the egg yolks. Gradually stir in a little of the hot mixture from the saucepan—this process, called tempering, prevents the eggs from scrambling.
- Combine and Continue Cooking: Pour the egg yolk mixture back into the saucepan with the rest of the hot custard. Cook for another 2 minutes while stirring continuously until the mixture is smooth and thickened.
- Add Coconut and Flavor: Remove the saucepan from heat and stir in the vanilla extract and the shredded coconut. The smell will be heavenly!
- Fill the Pie Crust: Pour the luscious coconut filling into the pre-baked pie crust. Spread it evenly and cover it to chill.
- Chill and Serve: Refrigerate the pie for at least 240 minutes or until set. Before serving, top generously with whipped cream and sprinkle additional shredded coconut on top for decoration.
Notes
To keep your pie fresh, cover it with plastic wrap or store it in an airtight container. It will stay good in the refrigerator for up to 3 days.
Nutrition
- Serving Size: 1 slice
- Calories: 380
- Sugar: 22g
- Sodium: 200mg
- Fat: 25g
- Saturated Fat: 15g
- Unsaturated Fat: 5g
- Trans Fat: 0g
- Carbohydrates: 35g
- Fiber: 1g
- Protein: 4g
- Cholesterol: 120mg